Arcane Cheese with Doomtrain Extreme
Spoiler Warning
If you want to go through the Final Fantasy 14 duty Hell on Rails (Extreme) blind, don't read this guide as it spoils how to easily solve one of the mechanics in it.
If you don't play Final Fantasy 14, most of the words in this article are going to make no sense to you and I will make no attempt to explain them. Just know that most of the words I am saying do have meaning even though they aren't in The Bible.
In phase 4 of Hell on Rails (Extreme), the boss will cast Arcane Revelation, which makes the arena look something like this:

There will be a very large circle of bad moving around the arena. One tank and one healer will be marked with an untelegraphed AoE attack that MUST be soaked by at least one other player (or two for healers). Doomtrain will move the circle of bad anywhere from 1-3 times and leave only a small area of the arena safe. Normally you're supposed to solve it something like this:

Instead of normal light party groups, break up into two groups: melee and casters. This will allow the melees to keep as much uptime as the mechanics allow, but also let the casters get uptime at a distance. Solving this is pretty easy with practice.
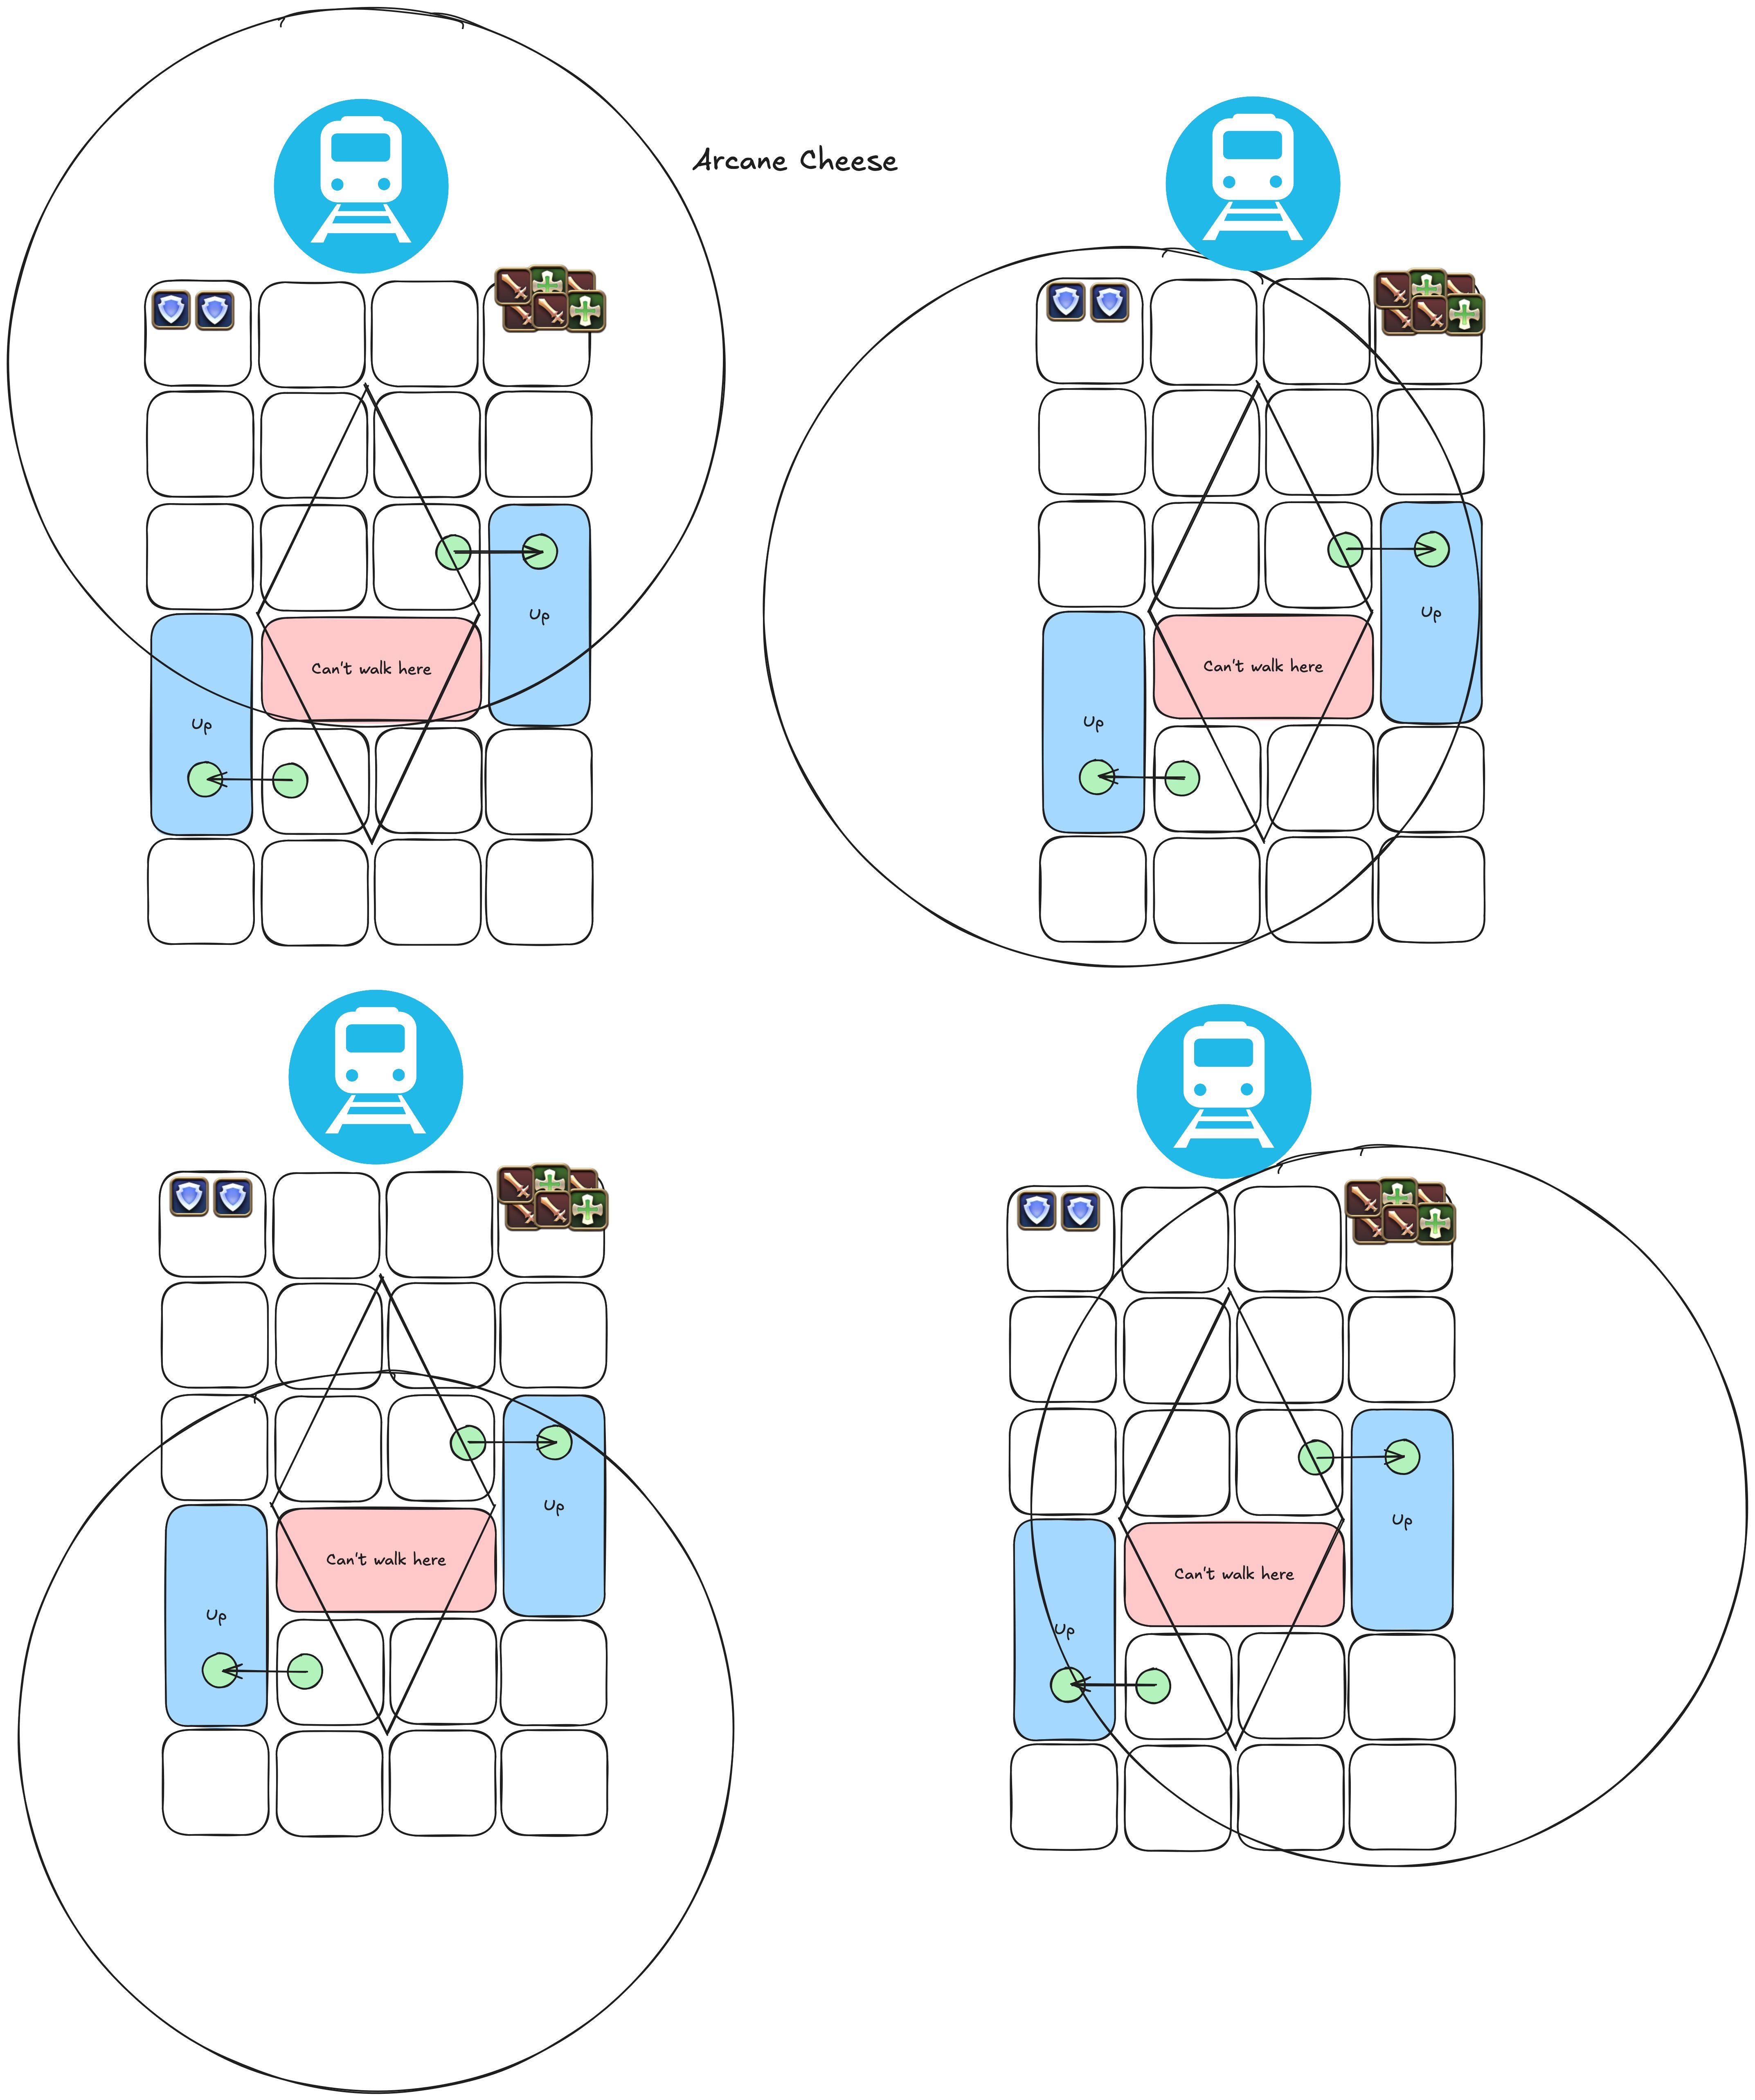
However as a caster this is kinda annoying because when the North side is safe, you have to fall down off the ledge and the only way to get back is by going around the long way with the janky teleporters that are annoying to hit on purpose but very easy to hit on accident. There is an easier way: you just stand in the upper corners so your melees can greed uptime and just soak all of the bad:
This looks a lot easier but is actually very technically complicated for nearly every class. My example solve for this includes the following party members:
- Tank 1: Warrior (WAR)
- Tank 2: Gunbreaker (GNB)
- Healer 1: White Mage (WHM)
- Healer 2: Sage (SGE)
- Melee 1: Samurai (SAM)
- Melee 2: Reaper (RPR)
- Ranged 1: Dancer (DNC)
- Ranger 2: Pictomancer (PCT)
The light party assignment is as follows:
- WAR, WHM, SAM, DNC
- GNB, SGE, RPR, PCT
Arcane Revelation can perform up to three hits. In each of the hits you need to mitigate the damage heavily or you will wipe. I've found the most consistent results doing this:
First hit: WAR casts Shake it Off, Reprisal, and Rampart; WHM casts Plenary Indulgence and Medica III; SGE casts Kerachole and Eukrasian Prognosis II; SAM (and RPR) casts Bloodbath and mostly focuses on DPSing as much as possible to heal from the massive damage you will be taking throughout this mechanic; DNC casts Shield Samba.
After the hit: heal as much as you can to offset the hit you took. If you're lucky you didn't take much. If you're not: you took a lot. Dancer's Curing Waltz can help here.
Second hit: GNB casts Heart of Light, Reprisal, and Rampart; SGE casts Holos and Eukrasian Prognosis II; PCT casts Addle.
After the hit: SGE casts a Zoe-boosted Pneuma. Generally you do what you can to heal and maintain DPS uptime. Hopefully you don't have to take another heavy hit.
Third hit: One of the tanks uses a Tank Limit Break 2, Healers dump as many mits as they have left, hopefully you won't die but getting to this point means you got very very unlucky.
Between each of these hits you need to heal everyone up to 100% as soon as possible otherwise you WILL wipe. Most of the damage assumptions in this guide assume that everyone is at 100% health. The melee classes can mostly be left to their own devices to greed as much uptime as possible, but they may need Aquaveil, Taurochole, or other single target damage mitigations as appropriate. By the end of this you will have used up all of your mitigations save tank invulns.
Here's a video of the first time I did this as Sage:
https://files.xeiaso.net/blog/2025/doomtrain-ex-cheese/sge-vid/index.m3u8
One of the tanks will need to soak a stack tower with an invuln. Everyone else runs to the back of the car to enter the next phase and then you continue the fight as normal.